3D Game Assets
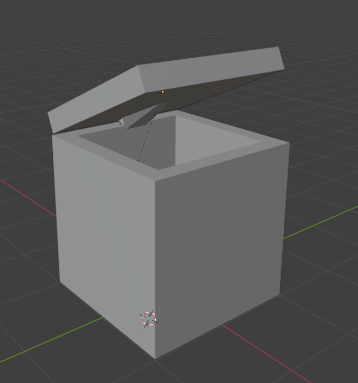
This assignment focused on creating two real-time 3D assets: a rigged humanoid character and an interactive chest. Both assets were developed in Blender and taken through a complete pipeline including modelling, UV unwrapping, rigging, skinning, animation, and export to Unity and Unreal Engine.
The assets were intentionally kept in a simplified blockout style so the focus stayed on building a technically correct workflow for game engines. The chest was created from two cube primitives, while the humanoid model was sourced externally so more time could be spent on deformation, animation, and engine integration.
Modelling & UVs
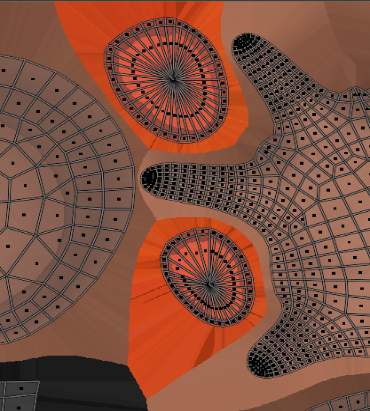
The chest used a clean, low-complexity structure suitable for rigging and real-time use. The humanoid mesh was adjusted around important joints, including the shoulders, elbows, and hips, to support better deformation during animation.
I unwrapped the models into UV islands inside the 0–1 space and placed seams in less visible areas to reduce noticeable texture breaks. The existing character materials and texture maps were also imported and applied to the model.
Rigging & Skinning
The humanoid was rigged using a bone-based armature in Blender. I started with a root bone at the feet and built a simple hierarchy through the hips, spine, shoulders, elbows, and hands. Left and right bones followed a consistent naming convention using Blender’s .L and .R system.
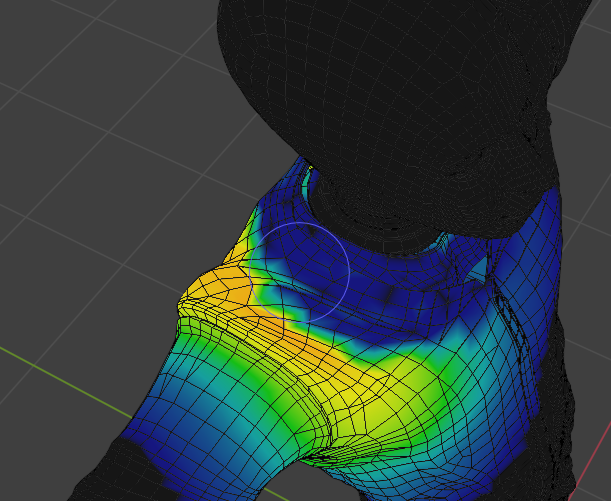
Automatic weights were used to bind the mesh to the armature, then refined through weight painting. This corrected distortion around high-movement areas such as the shoulders and elbows and produced smoother deformation during animation. The chest lid used a simple hinge bone to control its rotation.
Unity Implementation
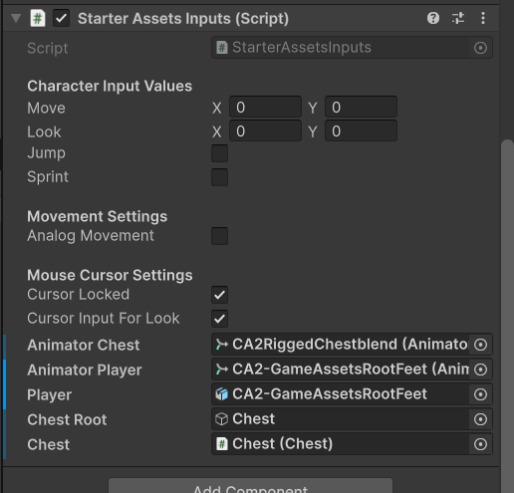
In Unity, I used the Starter Assets package for player movement and replaced the default model with my rigged character. I created avatars for both the custom model and Mixamo models, then configured an Animator with transitions, boolean parameters, and a blend tree for smoother idle-to-walk animation blending.
The chest opening animation was hand-animated in Unity. Pressing E moves the player beside the chest and triggers the interaction. Import settings were adjusted to bake the character’s Y position into the original pose and prevent floating during the animation. A video below can walk you through what I did.
Unreal Implementation
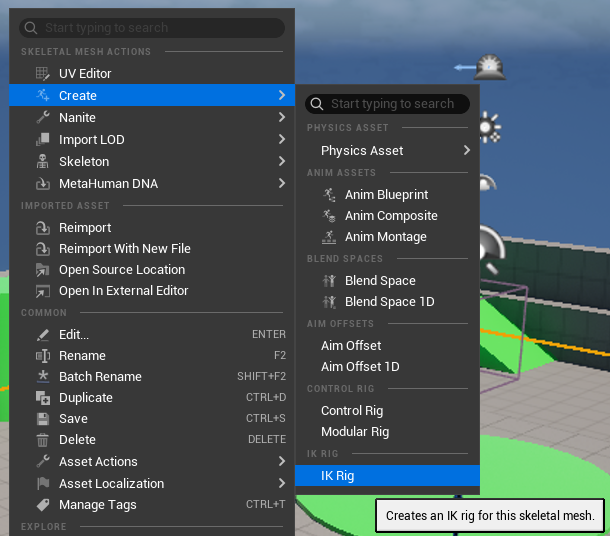
I also imported the FBX assets into Unreal Engine, where the character was split into a skeleton, skeletal mesh, and physical asset. To retarget animations, I created an IK Rig and an IK Retargeter, manually setting up rigging chains and mapping them to Unreal’s humanoid hierarchy.
This allowed animations to be converted for the imported character and gave me practical experience with the differences between Unity’s Animator workflow and Unreal’s retargeting tools. A video below can walk you through what I did.
Reflection
This project strengthened my understanding of the full 3D asset pipeline, from modelling and UV unwrapping through to rigging, skinning, animation, and engine implementation. The most valuable learning came from correcting weight-painting problems and comparing engine-specific workflows.
If I continued the project, I would improve the visual quality of the models, refine deformation and scale, and develop more polished materials while building on the technical pipeline established here.
Project Videos
Unity implementation and character animation demonstration.
Unreal Engine implementation and animation retargeting demonstration.